Baseball Practice Drills - Indoor
Indoor baseball practice drills can offer your players a large advantage over teams which do not utilize any practices until warmer weather, which is the norm in the Midwest and Northern states.
The key to successful indoor training is proper structuring and skill specific goals and drills. Obviously your options are limited due to practice area size restrictions, but this doesn’t make a productive practice impossible, it only makes proper planning more imperative.
I’m going to teach you numerous skill specific drills you can utilize in an indoor environment which are every bit as successful as any outside counterpart drill. Let’s begin with Hitting.
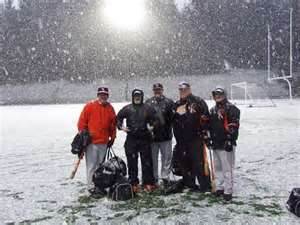
Ready To Play
baseball practice drills
Hitting Inside:
Wiffle ball & tee hitting.
Required Equipment:
(1.) Batting tee(s) ….. You can use as many tees as you desire if you want to train more than 1 hitter at a time.
(2.) Wiffle Ball(s) … At least 1 ball for each tee & 2 is better, which are the holes or slots type of ball. The solid plastic wiffle balls will work, but it drastically reduces the effectiveness of the drill.
(3.) A normal Wiffle ball bat, but not the kid’s huge barrel type, will work, but I preferred using wooden cork ball bats or wooden broom handles. (many broom handles simply unscrew from the stranded head)
Set-Up & Execution:
(1.) Position your players where they’ll be hitting towards a wall or folded bleachers, therefore controlling the distance and direction the ball travels protecting other players. The plastic ball will not damage any surface it strikes.
baseball practice drills
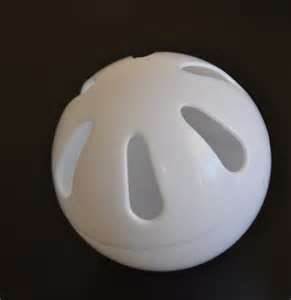
(2.) Have the player(s) set their wiffle ball on the tee. If the ball is the type which has a slotted pattern, it is suggested the player Not position the ball on the tee with the slots always setting the same way. Just like a baseball’s seams, set the slots up & down, then sideways mixing it up. (You’ll see why shortly) If the wiffle ball has holes in random patterns, it doesn’t matter how you set the ball on the tee.
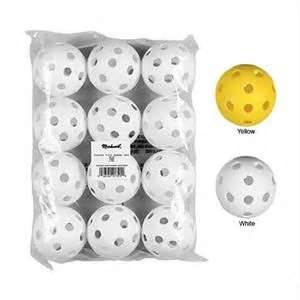
(3.) Have the player(s) hit @ 20 balls, but not too many more, because even with the light bat, fatigue will set in. Should you want players to take more swings, change them to another drill, then bring them back to hit again after their hitting muscles have recuperated.
(4.) When the hitter makes solid contact with the ball, it will produce a whooshing sound as it travels. No whooshing sound … the ball was not hit solidly. Doesn’t mean the ball wasn’t hit hard, but it was hit on the upper or lower portion of the ball, not in the middle. This is why changing up the slot positioning is important, as it affects the whoosh of a well hit ball.
Clickbank Products
Hitting Drill Two: Cages
Required Equipment:
(1.) Batting Tee, Baseballs and a Bat. I strongly suggest if at all possible have the players use a wooden bat instead of a composite, for this drill, as the sound, similar to the wiffle ball’s whoosh, tells volumes of how well the ball was actually struck.
baseball practice drills
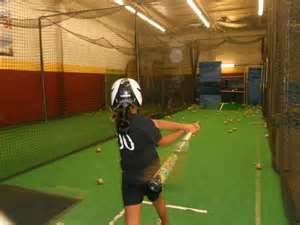
When you think of batting cages you may envision a large chain link fenced enclosures with pitching apparatus, either wheel or arm type, which require a large amount of space. In the past you would have been correct, but portable hitting enclosures constructed of plastic and netting are quite common now, and relatively inexpensive when compared with their older siblings.
Have the players, after a short recoup period, go from hitting wiffle balls to the batting cage where they’ll hit real baseballs off tees. Again, hitting @ 20 balls at any one set, is recommended. You’re not concerned about fatigue as if the player will drop before he finishes, you’re concerned about the slight, unseen difference in the swing fatigue can create, possibly causing bad mechanics.
baseball practice drills
Colored Markers
Hitting Drill Three: Identification or Dot Drill
Required Equipment:
(1.) Color Markers
(2.) Baseballs
(3.) Bat
There comes a time, dictated by lack of equipment, such as an indoor batting cage, or just plain old boredom, tired of hitting off a tee, when a coach needs to mix it up a bit.
It’s extremely important, and more so the older the players become, as pitchers begin throwing breaking balls, to be able to identify what type of pitch is coming in at him. The initial step in teaching hitters to identify pitch type is to teach how to laser focus on the ball as it travels toward you.
For this drill take numerous baseballs, old practice balls, new cheap unofficial baseballs or any other baseball you can scrounge up that is in reasonably good shape or can be cleaned up.
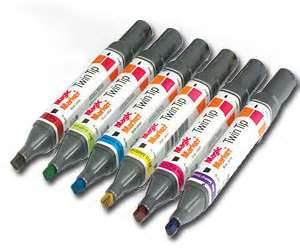
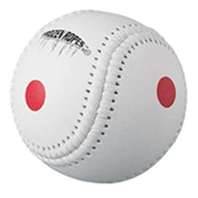
Using colored magic markers, identify each ball with a different color. You can do this by coloring portions of the baseball, between the seams, or putting numerous colored dots on the ball, numerous and large enough to see. Be sure to color several balls the same color so the batter can’t discount a color that’s already been throw, as the same color could be coming on the next pitch.
(1.) Using a rubber throw down home plate, set up a batters box.
(2.) Have a catcher, in full gear, catch the pitches.
(3.) Throw pitches from the @ half way to 2/3 mark of the regulation distance for the age of the players.
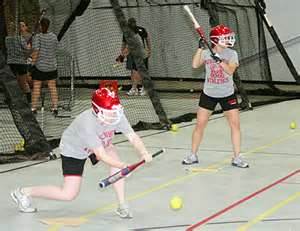
(4.) The batter is to assume his normal hitting position, stride, but keep the hands and bat back, Not swinging at the ball. He’s to call out the color of the ball as soon as he thinks he’s identified it, then follow the ball all the way to the catcher’s mitt to see if he was right.
baseball practice drills
Bunting In Softball Is Very Important
This drill can be fun with players heckling and laughing at one another, but it addressed a serious skill set of developing laser like focus on the moving baseball.
Bunting: Control
Baseball players, seemingly at all ages except possibly higher level pitchers, seem to hate learning how to bunt a baseball. As a coach we know the importance of a drag bunt base hit, or the importance of a sacrifice bunt to strategy, but players prefer to practice hitting the long ball.
Therefore, to encourage interest and motivation to learn the skill of bunting, we must turn the drill into a game. Be smarter than the ball.
Required Equipment:
(1.) Baseball
(2.) Bat
(3.) Rubber bases or cones
Set-up and Execution:
(1.) Use a throw down rubber plate to establish a batting box;
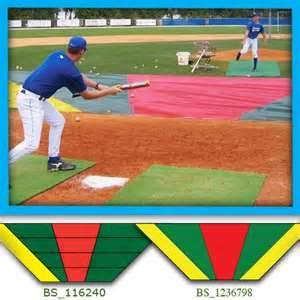
(2.) Use cones, rubber throw down bases, or any other safe object which will divide the field into 3 equal parts, from the plate outwards. I do not recommend using tape as it may leave a sticky residue on the gym floor when pulled up. This would not endear you to the janitor and could result in losing practice privileges.
Outside Version
baseball practice drills
(3.) Divide the players into teams of any size or numbers depending on other practice activities, usually the smaller the better to retain interest.
(4.) Each time a team goes through their lineup it’s counted as a half inning.
(5.) Tell the batter where you want the ball bunted, left, right center, before throwing the pitch.
(6.) Scoring the game.
(a.) If the batter bunts the ball where he was directed, the team is awarded 2 points.
(b.) If he just bunts the ball fair, the team is awarded 1 point.
(c.) If he bunts and misses the pitch the team loses 1 point.
(d.) If he bunts the ball into the air the team loses 2 points.
The team with the most points at the end of 9 innings is the winner.
The game is simplistic, but addresses several important issues:
(1.) Bunting the ball where you need to is important;
(2.) Getting the ball into Fair territory is a must in order to give the runner(s) a chance to advance.
(3.) Not making contact with the ball is very bad as the result could be a runner thrown out trying to advance.
(4.) Bunting a ball into the air is the kiss of death and must be avoided at all cost.
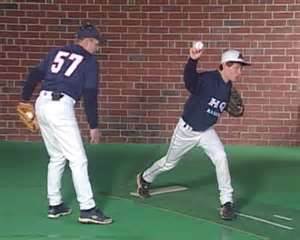
baseball practice drills
Pitching: Let’s switch up from hitting to pitching.
Unless you’re at the stage of your pitchers actually being ready to throw hard and experiment with new and different pitches, I would not have them working on such skills. Not to insinuate anyone is dumb, but unless you’re coaching high caliber players who play winter ball, your pitchers are Not ready to start throwing in earnest yet. Instead use the indoor practice time to work on learning and refining other basic aspects of their pitching.
Required Equipment:
(1.)Rubber pitching plate or other pitching devise;
(2.) Baseballs and Gloves.
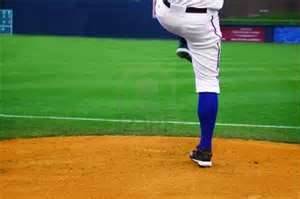
baseball practice drills
Proper Leg Lift
Set-up and Execution:
All indoor pitching drills are set-up with 45 feet being the bench mark distance. Pitcher 45 feet from catcher. Pitcher 45 feet from first baseman, and etc. This is designed to limit required space, but still allow for throwing of the baseball without short arming it.
(1.) Have your pitchers work on their standard wind-up mechanics;
(2.) Stretch Wind-up mechanics;
(3.) Stretch and throw over to first mechanics;
(4.) Step off mechanics;
(5.) Slide step delivery mechanics.
As you can see there is more than enough skills to develop and refine than just throwing pitches and all of these aspects are very important to master as the term “Pitcher” involves the complete package, not just a 100 mph fastball.
baseball practice drills to Indoor Baseball Drills
Learn Youth Baseball Coaching
baseball practice drills to Indoor Batting
New! Comments
Have your say about what you just read! Leave me a comment in the box below.