Pitching Mechanics
Let’s break down the Pitching Mechanics to basic elements of pitching then examine each in detail to see what each encompasses.
1. Mental Attitude
2. Set-up Positioning
3. Rocking Step and Leg Lift
4. Body Balance
5. Positioning of Hands
6. Leg Down with Hand Separation
7. Weight Shift
8. Arm Motion
9. Shoulder Motion
10. Foot Plant in Landing
11. Rear Foot Movement
12. Hip Rotation and Powering Through
13. Ball Release and Follow Through
Whew. I’m exhausted just listing the elements much alone performing them. Obviously a lot to teach and a lot to learn. Stages… Build in Stages

Obtaining the Grip
Pitching Mechanics
The foundation of Youth Pitching begins with mental focus. It’s important a pitcher develop a routine, an exact same routine, he performs before each pitch which sets the wheels in motion, where the mind sees the actual pitching mechanics performed correctly.
Before you say this sounds silly, it’s a scientific fact the body reacts to what the mind visualizes. See yourself throwing a strike, chances are better than 50/50 it’ll be a strike. See the ball going to the backstop…you see what I mean.
Part of this routine should be a mental check list of the situation, how many outs, the count, how many on, steal situation, what to do if the ball’s hit back to him, and although this may sound like a lot to consider, after a little practice it’s calculated in a second or two.
The Set Up portion of the procedure is for clearing the mind of clutter and allowing their muscle memory time to prepare, while beginning their “zoning” in on the target.

Pitching Mechanics - Full Extenstion
This is when they initially grip the baseball in their glove. As part of routine they need to grip the baseball the same way every time. The two long fingers should wrap across the seams, do not place the ball in the back of the palm.
It’s a common practice for older pitchers who throw several different types of pitches, to always initially grip the baseball in the most difficult grip, then adjust from there as it creates less movement of the hand inside the glove, helping disguise the pitch.
Hold the ball, do Not squeeze it tightly. **A sure sign of squeezing the ball too hard is throwing balls into the dirt in front of the plate ** It’s time to focus on the target, the catcher’s mitt. However, the mitt is not the final target but only the beginning of the zoning in process, as the pitcher should visualize a dime (at least a quarter) inside the catcher’s mitt. That’s their target as it Intensifies focus.
The next stage in pitching mechanics, depending on whether it be a stretch position or full windup, is the rocking step and leg lift, which is intended to begin movements which will get the body started into the pitching motion.

Wide Open Chest & Shoulders
For all examples, we assume the pitcher is right handed.
Stretch Pitching Mechanics:
Place the side of your right (back) foot against, not on, the pitching rubber. Your left (lead) foot will be 2-3 foot in front of your body, while holding the baseball in their pitching hand.
While slightly being bent forward, begin focusing, zeroing in on the dime, take a breath. Then bring their left leg back towards their back leg, while at the same time bringing their hands together about chest high.
The left foot should stop a few inches in front of the back foot, although there’s nothing wrong with having the feet touch, I find it sometimes makes maintaining balance a problem.
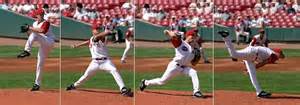
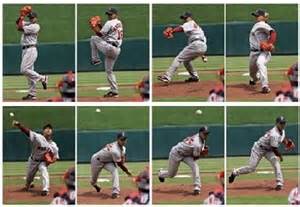
2 Different Pitching Sequences
The hands do not touch the chest while in the set position, rather they are 2”-3” away. Again…find the dime.
The left (lead) leg is smoothly lifted upwards to where the knee stops between the belt buckle and the chest. This is where it becomes critical to be able to maintain good balance.
We’ll pause and allow you to digest and practice these steps of the stretch pitching mechanics, as the rest of the pitching motion, in many ways, mimics the full wind-up mechanics, which we’ll be practicing.
Full Wind-Up Pitching Mechanics:
Your starting posture is facing the plate, I suggest the right foot on the pitching rubber, but I have seen pitchers have both feet on it, whichever method you feel the most comfortable.
Beginning your pitching motion, bring the left (front) foot backwards and about 3”- 6” to the side of the right (back) foot.do not exaggerate these foot distances! To bring the foot too far back behind the rubber or too far to the side will throw the body off balance.
Start off balance and you’ll either try to regain balance throughout the entire delivery or throw off balance. Either way your control and velocity will be negatively affected.
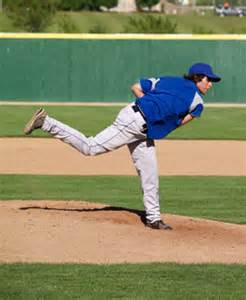
Pull Through To The Hip
Turn your right (rear) foot into proper alignment with the pitching rubber, side of foot against it, this will produce a swivel action which turns the hips and the body sideways on the mound. You should not turn too far sideways to where your back is facing the batter. This will do several negative things from throwing you off balance to losing sight of your target.
***I know there have been major league pitchers who have done this in their windup. There’s always exceptions to the rule.***
In Youth Pitching Mechanics I can not stress balance enough. So I’ll say it again. Balance is crucial !
It’s important for balance and timing issues, for the hands, gripped ball in the glove, to remain together and chest high until the front leg begins to go forward or down, then the hands will separate.
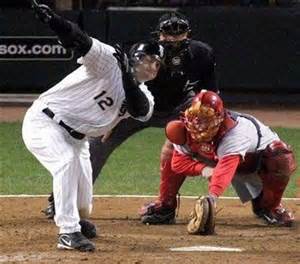
Just Like A Batter Off Balance
This is important, the lead leg goes down and out, not out and down. Your toes should be pointed down as you proceed forward, landing flat footed or slightly forward on the balls of your foot. You don’t want to land heel first, if you do you are probably opening your hips and shoulders too soon which will cost you velocity, control and probably a sore arm.
Now your arms separate, left arm forward pointing at the plate, right arm moves backwards into the cocked or High - L position.
Your left arm is not pointing straight at the target, but is rather bent a little at the elbow which makes it like a gun sight for zeroing in on the target.
Controlling your weight shift is important in pitching, as keeping your weight balanced over your rear (back) leg as long as possible is key to good velocity. Proper balance keeps everything in alignment until the left (lead) foot plants in the dirt, which will release the power of the hips along with the arm and shoulder power, increasing velocity and control.
If the body is out over the hips, you loose most of that additional power generated by the whipping motion of the hips and leg drive.
The arm action and lead foot plant must be synchronized for maximum speed and control. The lead foot should stride forward towards the plate as far as possible without being uncomfortable, landing on the balls of the foot which is slightly pointing towards the right handed hitters batters box.
***Caveat*** Remember the Pitching T. If the landing foot is on the right side of the line, the shoulders are too closed causing the pitcher to throw across his body losing velocity and control.
Too far to left and the shoulders have opened too soon, again resulting in loss of power and control.
The back (rear) foot is pulled off the pitching rubber by the action of the hips turning. Contrary to popular belief, You do not push off the rubber with your back leg. Doing so will force the upper body forward over the hips forcing everything out of balance, ruining the entire delivery.
As the lead foot lands and while the shoulders are still closed, the hips will power the pitching arm through the “pitching slot” and pull the rear foot off the rubber.
As a coach look to see if the pitchers’ shoulder, head and eyes are more or less level with one another, allowing for good follow through motion.
The release of the ball should be out in front of the head and the arm should continue to move to the opposite hip, which allows the coiled energy within the body and arm to be completely released. Should a pitcher short arm or pull back his arm, like throwing a yo-yo, there is an increased chance of arm injury occurring.
It’s like slamming on your brakes instead of allowing your car to roll to a gentle stop.
Pitching Mechanics Back To Learn to Pitch

New! Comments
Have your say about what you just read! Leave me a comment in the box below.