Little League Baseball Injuries
Little League Baseball Injuries, no matter how hard we try to prevent them from occurring, happen. It’s an unfortunate fact of life that if they could be totally avoided, Major League Teams paying players Millions of dollars a year, would have figured out how to keep their Star from getting hurt and sitting on the bench.
The only thing we can do as Coaches is to train our players the proper and safe methods of playing and be prepared to quickly and correctly treat an injury if and when it happens.
We’re going to exam the Top little league baseball injuries and how to treat them in the next few segments.
Always Have a First Aid Kit Available ! That’s our number one rule. It doesn’t have to be the envy of Paramedics, just a standard first aid kit you can acquire at the pharmacy or sporting goods store. I used to keep my kit in the baseball bag, because I knew I wouldn’t forget to bring baseballs to the game or practice.
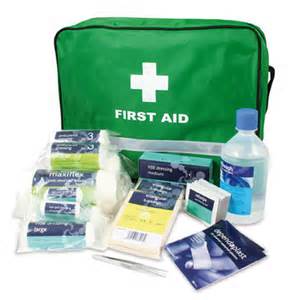
Little League Baseball Injuries - A First Aid Kit Is A Must ... It Doesn't Have To be Professional Grade Quality
Blisters are probably the most common injury of anyone who plays sports and baseball players are particularly vulnerable. Most players accept it as a by product of playing hard, but there are a few things you can do to help prevent them.
What Causes Blisters? Little League Baseball Injuries
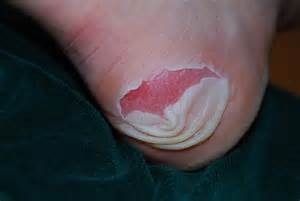
(1.) Blisters are normally caused by friction on the skin, which can result from equipment or clothing rubbing the skin, or actual play such as pitcher develops by gripping the seams when he throws too many of a certain type of pitch, as this constant friction causes the top layer of skin to separate from the second layer.----- Little League Baseball Injuries
(a.) Normally the first indication a blister is beginning to form is the redness and warmth on the skin called a “Hot Spot”.
(b.) Next, fluid will fill the space between the 1st and 2nd layer of skin to provide protection to the body from continued rubbing.
Ways to Prevent Blisters -- Little League Baseball Injuries
Since blisters are caused by friction, maximized by moisture build up, to the skin, the obvious prevention is to eliminate or at least minimize unnecessary rubbing.
(a.) For the feet, a major target of blisters, it is imperative you wear correctly fitting footwear.
(b.) To reduce moisture try “moisture-wicking socks” made from synthetic blends which absorb moisture keeping your feet dry.
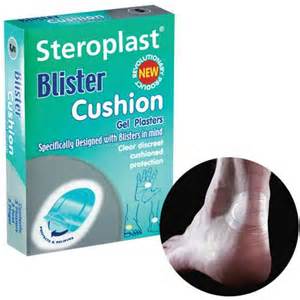
(c.) Should you feel a hot spot developing during a game or practice, it’s essential you stop the rubbing before it turns into a blister. One way of doing this is to place a cushion, such as a band-aid over the spot. I accidentally discovered, duct tape works especially well for this. Although not as cushioned, the tape stays in place better and longer than a band-aid and the slick backside easily slides under whatever is rubbing.
(d.) Depending on where the hot spot is, usage of talcum powder, baby powder or an assortment of various creams and gels available to prevent diaper rash is also good choices to apply.
How to Treat a Blister --- Little League Baseball Injuries
In spite of our best efforts blisters still occur, so let’s look at treatment. There are two primary goals in treatment, keep the blister from getting bigger and to avoid infection.
A small blister which doesn’t hurt and is now removed from the situation which created it, such as buying larger shoes, is better off being left alone, as the 1st layer of skin will protect the body from infection as it heals.
However, should the blister hurt or shows signs of infection, it must be treated. (signs of infection include pus draining from the area, very hot skin around the area or red streaks leading away from the blister.)
The steps for proper treatment of the blister is as follows:
(1.) Thoroughly clean the blister and surrounding area with rubbing alcohol or antibiotic soap and water.
(2.) Sterilize a needle over a flame, such as a lighter or match, until the tip turns bright red. Allow the tip to cool, but be careful not to contaminate it by laying it on a dirty surface, while waiting. If no flame is available thoroughly wipe or soak the needle in the rubbing alcohol or soap.
(3.) Using the needle, puncture a hole in the blister and allow the built up fluid to drain. Apply gentle pressure and rub the needle along the top of the blister pushing untrained fluid out the hole.
(a.) Once it’s completely drained apply an antibiotic on the wound and cover with a bandage or band-aid. Depending on the blister’s size, more than one puncture may be required to drain the larger amount of fluid.
(4.) Monitor the healing, but there should be no problem with it naturally healing. Should an issue arise, seek professional medical treatment.
Little League Baseball Injuries - Elbow Tendonitis
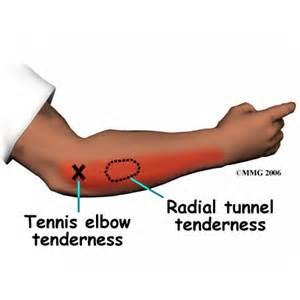
The term Little League Elbow, or Tennis Elbow, is used to describe a soreness in the elbow, which can affect little league baseball players, which is caused by excessive and repetitive throwing by young baseball players, usually pitchers, before puberty.
A Layman’s definition of the injury is the ligament attached to the inner side of the elbow begins to pull one of the growth plates away from the rest of the bone, causing soreness.
This is why this injury usually happens in players who have not reached puberty, as the bones are still growing and the growth plates are weak and susceptible to this type of injury.
Certain types of throwing have been associated with causing the injury, therefore coaches should be aware and monitor the situations.
(1.) Throwing too hard and too often. Many little leagues have rules restricting the number of innings a pitcher may throw, but others do not. In any event it is ultimately the coach’s responsibility to monitor and protect their players.
(2.) Throwing too many curve balls or sliders at too young of an age. Coach’s should place a definite restriction on whether a pitcher is allowed to throw breaking balls and / or a limited number.
(3.) Increasing the number of pitches thrown per week too quickly. This can occur quite by accident, such as playing 3 games in a week instead of 2 due to rain outs, or being involved in a tournament.
(4.) Changing elevation and pitching mechanics, such as moving to a pitchers’ mound or increasing the throwing distance. Moving to a mound is an obvious Red Flag, but moving from 45’ to 54’ can be overlooked.
Although a coach can not prevent every injury, it’s important that he is aware of circumstances he’s involved with and let’s players know what he wants and expects off the field as well.
You don’t want to practice a pitcher to his maximum number of pitches and not know he’s throwing an additional 50 pitches a night with his dad, then wonder why he has a sore arm. You must tell the kids what you want and if no throwing except at practice is one of them…let them know.
Little League Baseball Injuries - Symptoms
(1.) Pain around the bony knob on the inner side of the elbow…
(2.) Pain when throwing overhand…
(3.) Possible swelling in the area and pain when gripping or carrying heavy objects may also be present, but not always.

Treatment of Little League Elbow -- Little League Baseball Injuries
(1.) Rest - Do not pitch or do activities which cause any elbow pain. Do not return to playing baseball until the pain is completely gone.
(2.) Cold - Apply an ice compress to the outside of the elbow for 20 minutes, four times a day, for several days.
(3.) Medication - Consult your physician about this, because anti-inflammable medications may hide the pain of a more severe injury.
Little League Baseball Injuries - Tips
(1.) Limit your pitching to 4 - 10 innings, @ 80 - 100 pitches per week, and you mustn’t forget about practices. Do not throw 60 pitches in a game then 2 days later throw 50 pitches in practice.
(2.) Resist allowing your pitchers to throw curve balls and sliders until at least middle school age and preferably high school age.
(a.) This will be extremely difficult because other pitchers in the league will be throwing them and although your pitchers will have better success and less risk of injury waiting until a later age …. There is reality.
(3.) Teach your pitchers to throw an off speed pitch at an early age, concentrating on making a change up as being your primary off speed pitch.
(a.) Teach an overhand curve ball and severely restrict the usage, sprinkling one in every now and then just to let the opponent be aware the pitcher can throw one. Sometimes the fear of looking for a curve ball that never comes is better than throwing one to the batter.

Additional Tips for the Prevention of Little League Elbow
(1.)
Be sure you warm up before pitching by jogging or aerobics. This is
necessary no matter what the weather or temperature, although cool or
damp weather poses additional hazards.
(2.) Stretch your muscles
slowly and gently before pitching. Regardless of age or physical
condition, stretching must be mandatory prior to pitching.
(3.) Learn good pitching mechanics.
(4.) Limit the number of pitches thrown per week.
Sometimes a player will not want the Coach to know he’s hurting. It’s
your job to analyze any change in your pitcher’s mechanics which may be
caused by pain.
Having a bad outing and allowing 15 hits
doesn’t necessarily mean there’s anything physically wrong with the
player, but it should be a red flag to keep the possibility of an injury
in the back of your head to watch for.
Little League Baseball Injuries Back to Physical and Mental Injuries
Learn Youth Baseball Coaching
New! Comments
Have your say about what you just read! Leave me a comment in the box below.